Kids will learn about drawing a one-point perspective picture with this interactive dinosaur art project. We’ve included a free printable to make this project easy for home and classroom use.
What is one point perspective?
One-point perspective is a drawing method that shows how things appear to get smaller as they get further away, converging towards a single “vanishing point” on the horizon line.
– Westmoreland Museum of American Art –
By using one point perspective, artists can direct the viewers attention to a certain area. Perspective also gives the illusion of depth, distance, size, etc. Once kids learn how easy it is to draw in one point perspective, they can use that knowledge to enhance future projects.
Related: Younger kids may enjoy coloring this free printable Dinosaur Poster!
Supplies Needed to Make this Interactive dinosaur Art Project

- Free Dinosaur Printable (Download Below) – printed on cardstock, 2 pages
- Coloring Medium of Choice- crayons, colored pencils, markers, etc.
- Pencil
- Sharpie
- Scissors
- Ruler
Download the Free Dinosaur Printable Here
This download makes the project interactive and saves kids time from drawing the dinosaur image. By using this printable, kids are able to jump right into learning about drawing in one point perspective. There is a blank tab on the printable for kids to draw their own monster, character, etc. if they do not wish to use the one provided.
Directions to Make This interactive dinosaur ART pROJECT
Step 1

Using a pencil, place a dot on one edge of the paper. This dot can be even with the line already printed on the page. This is the vanishing point for this one-point perspective project. All lines will “vanish” into this spot.
Step 2

Using the pencil, and ruler, draw 3 to 4 lines starting from the vanishing point to the other side of the page. These lines need to be drawn lightly where they can be easily erased.
These vanishing lines are guidelines for the kids to use for the remainder of the drawing. They do not have to use all of the lines as references. Kids can also add more lines if needed as their drawing progresses. This is simply the starting point.
Step 3

Using the vanishing lines as a reference, draw a scene. All items need to fit into these reference lines. For instance, a row of buildings will all follow the same line, giving the illusion that they get smaller. The same for the windows on the buildings, trees, plants, people, etc. Anything the child chooses to draw will need to fit within these vanishing lines.
Step 4

Using a permanent marker, kids trace over the image lines they want to keep. They do not trace the unnecessary guidelines.
Erase unused guidelines.
Step 5

Using medium of choice, color the drawing and dinosaur tab.
Step 6

Cut out the dinosaur tab and a slit along the line on the perspective drawing. Emphasize that kids are not to cut the entire page off at the line. Younger kids may need help with this step.
Tape can easily be applied to repair any incorrect cuts.
Step 7

Insert T-Rex tab into slit and slide the dinosaur along the line. Notice how the one point perspective gives the illusion of changing the dinosaur’s size based on where it is placed in accordance to the vanishing point. This illusion occurs because the dinosaur is not confined to the perspective lines.
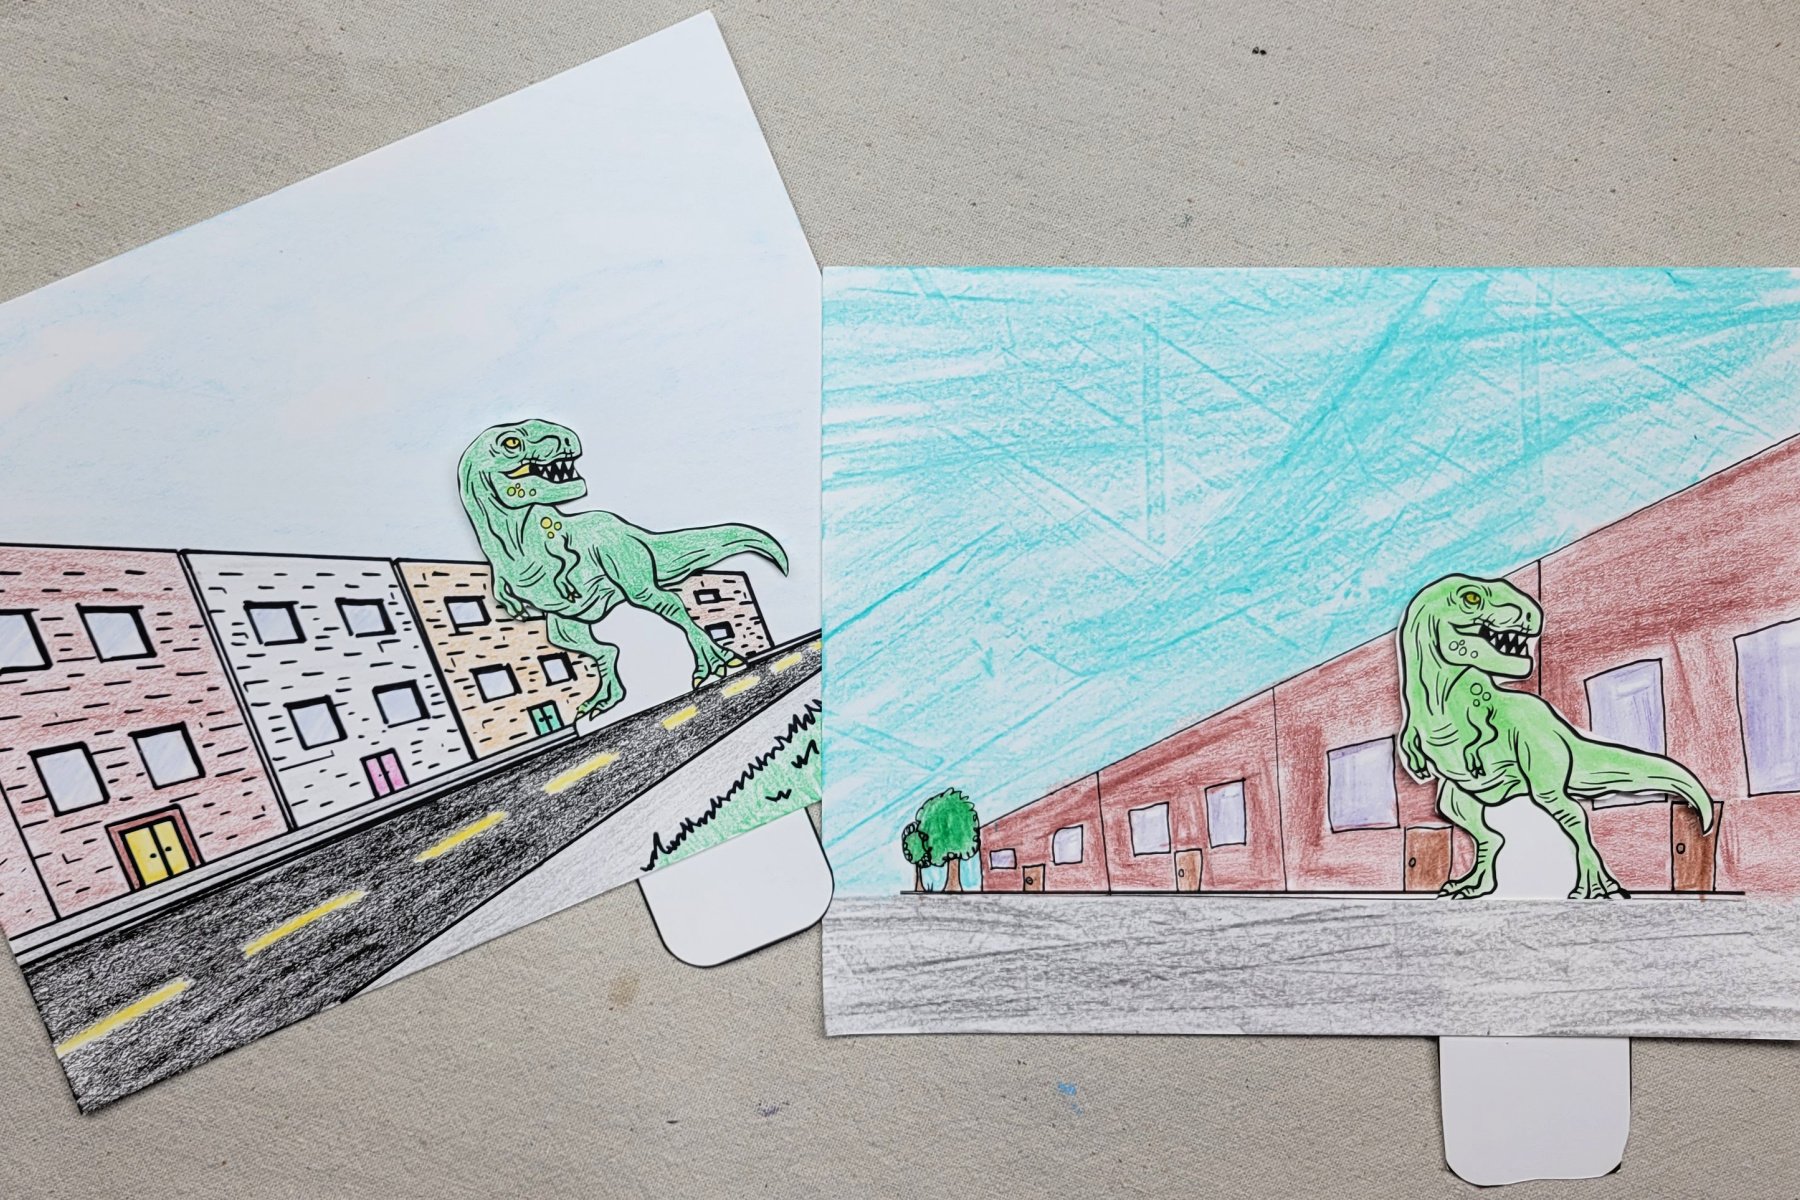
Finished interactive dINOSAUR Art Project

Kids always love seeing their completed projects, and so do I! It’s always fun to see how sliding the dinosaur back and forth gives the illusion of him changing sizes based on the perspective lines. Since these projects are created on paper, they are easily displayed in any way you choose.
Our Experience Making this interactive Dinosaur Art Project
The interactive aspect of this piece gives kids a hands on visual of how one point perspective works in art. By sliding the dinosaur along the page, kids easily see how they can alter the viewers perspective. My students have enjoyed making these and using another tab to pretend someone is running from the monster. I love hearing their excitement and laughter over a project they just created.
Prep Time
5 minutes
Active Time
40 minutes
Total Time
45 minutes
Difficulty
Medium
Estimated Cost
$1
Materials
- Free Dinosaur Printable – printed on cardstock, 2 pages
Tools
- Coloring Medium of Choice- crayons, colored pencils, markers, etc.
- Pencil
- Sharpie
- Scissors
- Ruler
Instructions
- Using a pencil, place a dot on one edge of the paper for the vanishing point. All lines will “vanish” into this one spot.
- Using the pencil, and ruler, draw 3 to 4 lines starting from the vanishing point to the other side of the page. These lines need to be drawn lightly (so they can be easily erased).
- Using the vanishing lines as a reference, draw a scene. All items need to fit into these reference lines.
- Using a permanent marker, kids trace over the image lines they want to keep. Erase unused guidelines.
- Using medium of choice, color the drawing and dinosaur tab.
- Cut out the dinosaur tab and a slit along the line on the perspective drawing.
- Insert dinosaur tab into slit and slide the dinosaur along the cut line.
Notes
INTERACTIVE DINOSAUR ART PROJECT VARIATIONS
- Use watercolor or another medium to complete the project.
- Add a second creature using the blank tab, maybe someone running from the dinosaur?
- Use the blank tab to create a completely new creature and scene.
interactive Dinosaur Art project Variations
- Use watercolor or another medium to complete the project.
- Add a second creature using the blank tab, maybe someone running from the dinosaur?
- Use the blank tab to create a completely new creature and scene.
Other Fun Dinosaur Art Projects from Kids Activities Blog
What creatures did your kids use for their one point perspective scenes? What kind of background was the creature running through?