School-aged kids will learn about various color combinations when shading with watercolor in this fun project. This basic technique can easily be used at home or in the classroom.
SHading Color Choice
This project focuses on a few color theory options when it comes to shading in watercolors. Many kids default to using black for shadows, but this lesson provides other options that may be better suited for their project. We will explore these four color combinations in today’s project:
- Shading with Black
- Shading with Blue
- Shading with Analogous Colors
- Shading with Complementary Colors
Related: Review Analogous and Complementary Colors.
Supplies Needed to Make this Shading with Watercolor Art Project

- Watercolor Paper
- Watercolor Paints
- Fine-Tip Permanent Marker
- Pencil
- Paintbrushes
- Water
- Paper Towels
Directions to Shading with Watercolor
Step 1

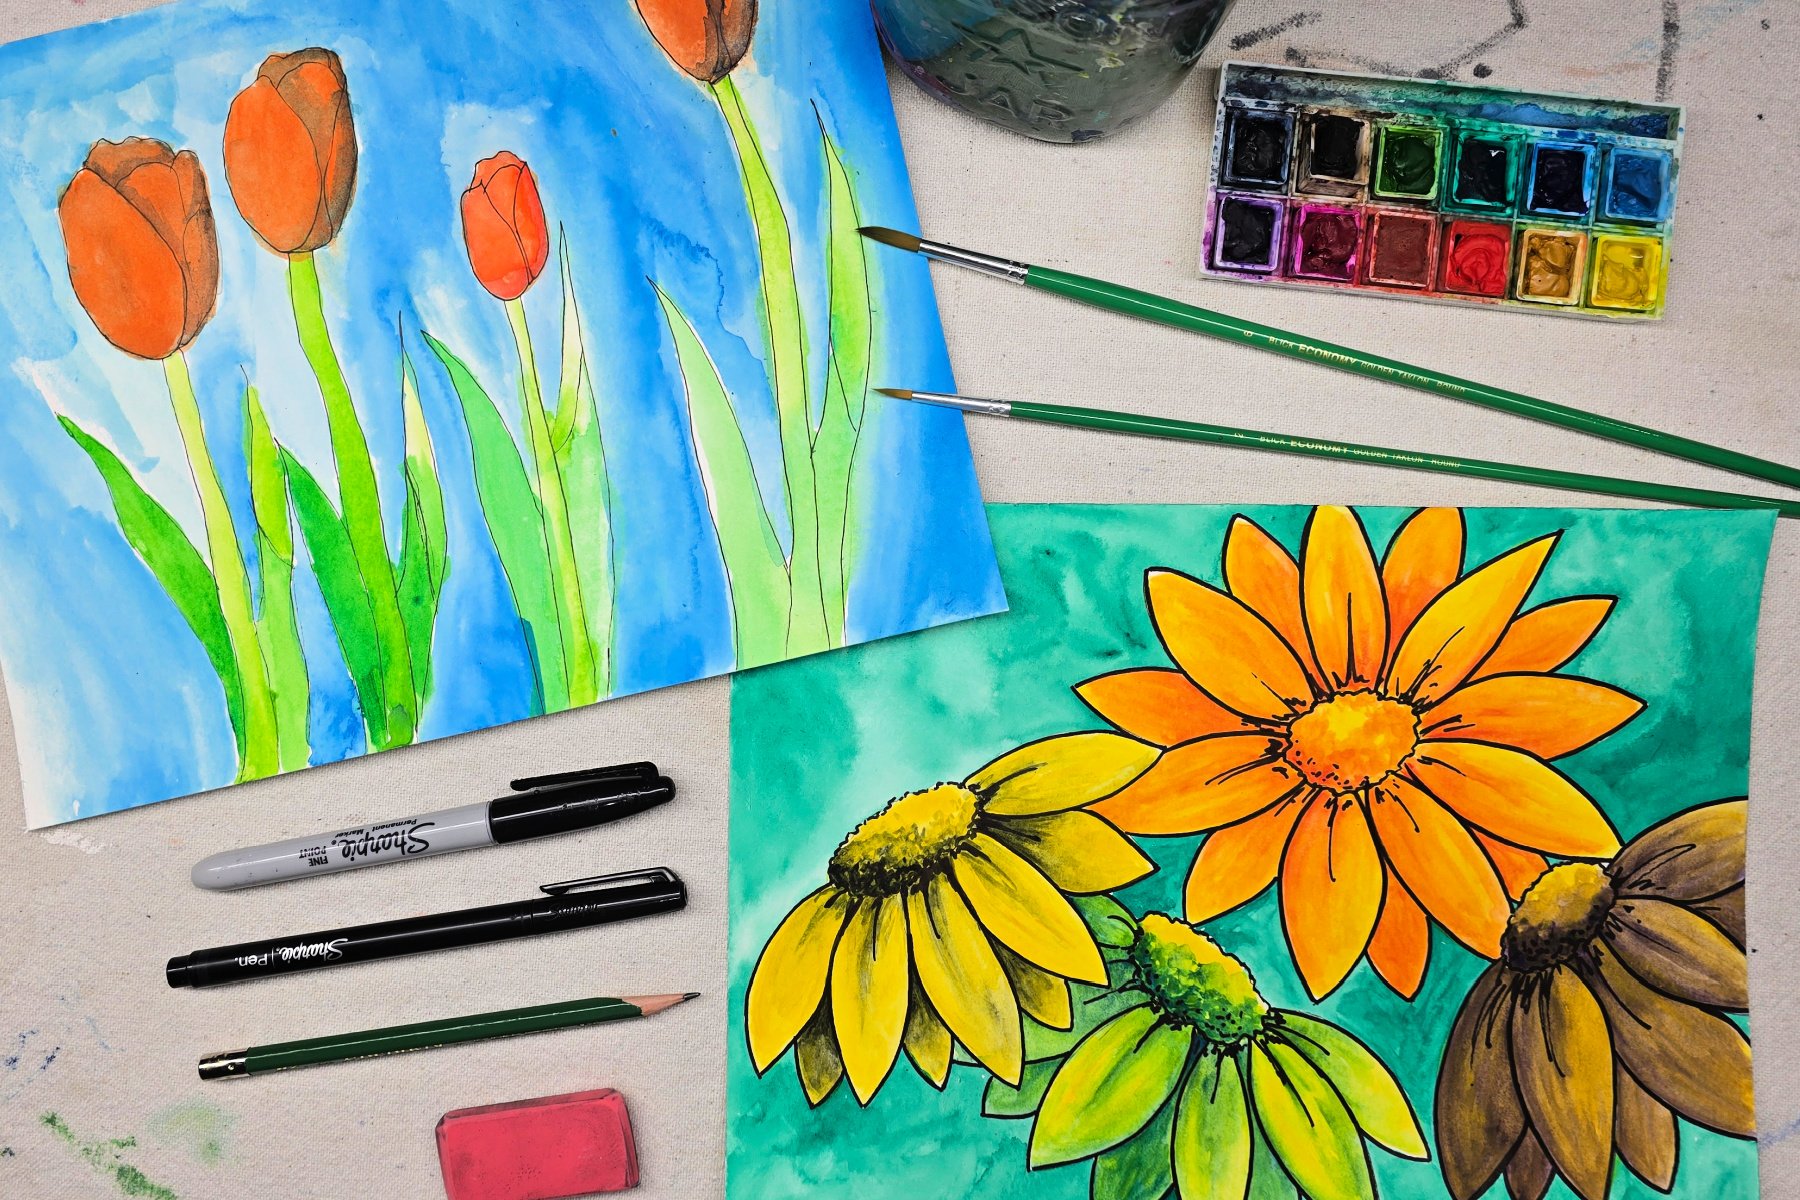
First, use a pencil to lightly sketch a design on watercolor paper. Design should contain at least 4 flowers for shading comparison.
Step 2

Next, trace final pencil sketch using a fine-tip permanent marker. Erase unwanted pencil lines.
Step 3

Then, use watercolor to paint all 4 flowers the same color.
Step 4

When colored layer is dry, begin adding black shadows to your first flower. Practice fading shadows by using a gradient wash to create a more natural appearance on the flowers.
Step 5

Next, move to another flower and begin shading using only a dark blue watercolor pigment.
Step 6

Then, shade another flower using only analogous colors. Remember, analogous colors are simply those that are next to your original color on the color wheel. For example, yellow is between green and orange on the color wheel, either of which could be used for shading in this instance.
Step 7

Next, shade the last flower using only a complementary color. Complementary colors are those opposite on the color wheel such as green and red, blue and orange, purple and yellow.
Step 8

If desired, return to the dried flowers and paint additional layers to brighten your design or darken your shadows. Use caution to not overwork and disrupt previous layers.
Step 9

Then, paint area surrounding the flowers.
Step 10

Finally, you can add finishing touches using the permanent marker once paint is dry.
Finished Shading with Watercolor Art Project

I love how our examples display different shading options within one single piece of art! Since these projects are made on paper, they can easily be framed, clipped, or displayed in your preferred style.
Our Experience Making this Shading with Watercolor Art Project
What I like most about this project is how it showcases how easily color choices impact our art. Each flower starts with the same color, yet the end results are vastly different. Some color combinations create bright, cheerful flowers, while others appear to deaden or dull the flowers.
This project is also a wonderful opportunity to review various color theory lessons when choosing analogous or complementary colors. If kids choose to paint orange flowers, they will soon discover that orange’s complementary color is blue. Rather than having two flowers shaded in the same way, encourage your child to try a different shade of blue to see how that alters the finished image.
Prep Time
5 minutes
Active Time
45 minutes
Total Time
50 minutes
Difficulty
Medium
Estimated Cost
$1
Materials
- Watercolor Paper
- Watercolor Paints
Tools
- Fine-Tip Permanent Marker
- Pencil
- Paintbrushes
- Water
- Paper Towels
Instructions
- Use a pencil to lightly sketch a design on watercolor paper. Design should contain at least 4 flowers for shading comparison.
- Trace final pencil sketch using a fine-tip permanent marker. Erase unwanted pencil lines.
- Use watercolor to paint all 4 flowers the same color.
- When colored layer is dry, begin adding black shadows to your first flower. Practice fading shadows by using a gradient wash to create a more natural appearance on the flowers.
- Move to another flower and begin shading using only a dark blue watercolor pigment.
- Shade another flower using only analogous colors. Remember, analogous colors are simply those that are next to your original color on the color wheel. For example, yellow is between green and orange on the color wheel, either of which could be used for shading in this instance.
- Shade the last flower using only a complementary color. Complementary colors are those opposite on the color wheel such as green and red, blue and orange, purple and yellow.
- If desired, return to the dried flowers and paint additional layers to brighten your design or darken your shadows. Use caution to not overwork and disrupt previous layers.
- Paint area surrounding the flowers.
- Add finishing touches using the permanent marker once paint is dry.
Notes
Shading with Watercolor Art Variations
- Adapt design to fit any season or theme.
- Practice shading with these color choices in other mediums such as colored pencils and acrylic paints.
- Add extra flowers and practice more color combinations for shading.
Shading with WAtercolor Art Variations
- Adapt design to fit any season or theme.
- Practice shading with these color choices in other mediums such as colored pencils and acrylic paints.
- Add extra flowers and practice more color combinations for shading.
Other Fun Watercolor Art Projects from Kids Activities Blog
Did your kids enjoy learning about shading with watercolor by using these different color combinations? Which color was their favorite shading option in this project?