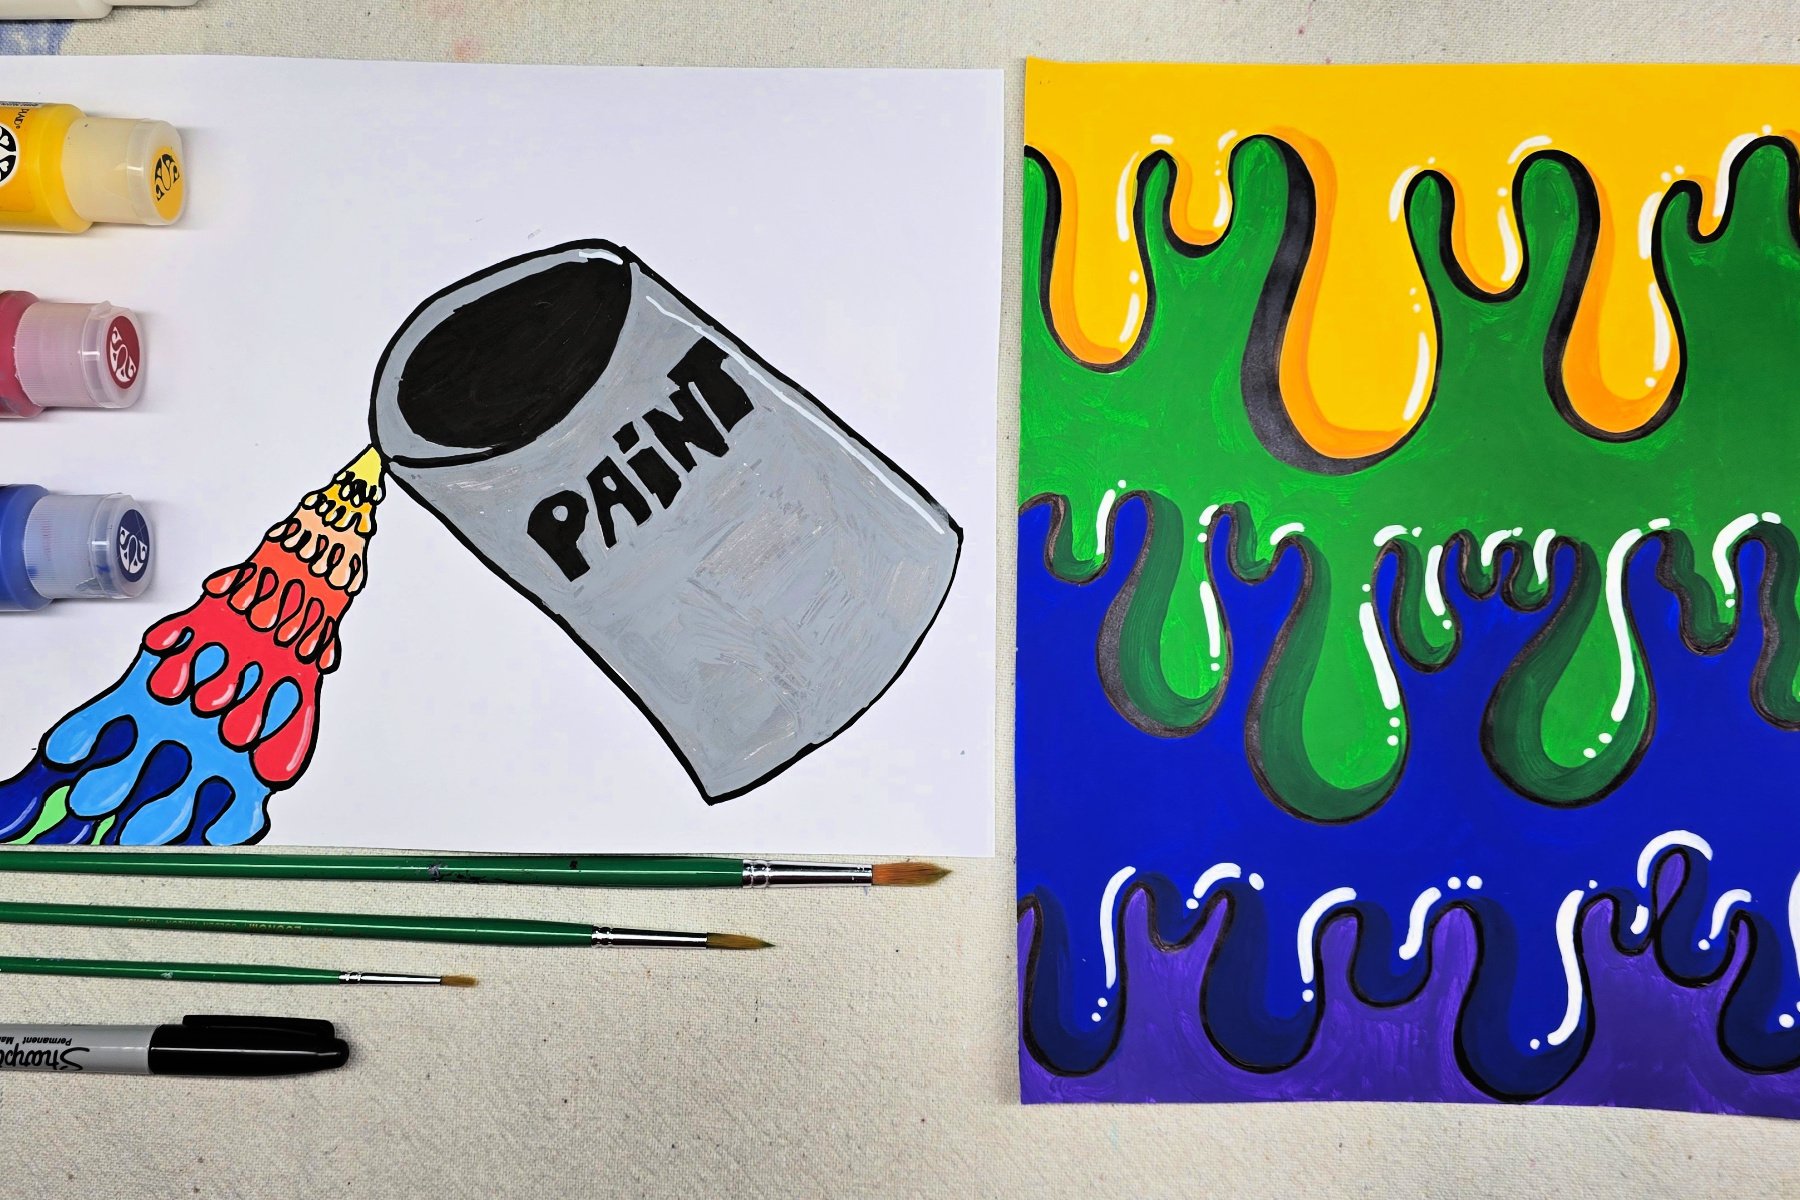
School-aged kids will learn how to draw dripping paint in this fun project. Our simple technique can easily be used at home or in the classroom.
Shadows and Highlights
Drawing or painting shadows is achieved by creating a darker area to indicate where light isn’t reaching an object. Highlights, on the other hand, are areas where the light source is shining onto the object, creating a lighter area. The bold white highlights used in this project further imply the illusion of wet paint. In this project, we are simply placing shadows and highlights opposite of one another on the paint drips. This quickly gives our project the illusion of dimensional wet drips of paint.
Related: Practice more shading techniques with our free printable.
Supplies Needed to Draw this Dripping Paint Art Project

- Cardstock
- Permanent Marker
- Acrylic Paints or Paint Pens
- Round Paintbrushes
- Water
- Paint Palette
- Paper Towel
Directions to Draw Dripping Paint
Step 1

Draw drips of paint onto cardstock. Create various size drips for a more realistic appearance. Also, the bottoms of the drips should appear larger, or rounder, than the top portion, indicating the bead of paint that is dripping down the page.
Step 2

Next, use the permanent marker to draw bold shadows along one side of the paint drips. The shape of the shadow line should mimic the shape of the original drip line drawn in previous step.
Step 3

Next, kids practice brush control while they add color to their paint drips. By painting with light pressure and just the tip of the brush, kids can paint in smaller places. They can also cover larger areas by applying more pressure and flaring the bristle out on the brush.
Step 4

Then, add shadows on your paint drips. These will be painted on the same side that the shadows were drawn with the permanent marker. Try not paint over the permanent marker, just beside it! Kids will need to use a darker shade than their paint drip color to create these shadows. For example, here we added a touch of red to the yellow, a touch of blue to darken the green, and lastly a bit of purple into the blue.
Step 5

Use the tip of the paintbrush, and white paint, to add highlights on the paint drips. These will be painted on the opposite side of the drips than the shadows. Create highlights of various sizes and shapes that follow along with the outlines of the paint drips.
Step 6

Finally, add any finishing touches to the painting. I chose to retrace the permanent marker lines at this point to cover where I had accidentally painted over them. Just be sure the paint is dry before touching up any of the permanent marker lines to protect your marker tip.
Finished Drawing Dripping Paint Art Project

I love the bold, bright colors used in these paintings! Since these projects are made on paper, they can easily be framed, clipped, or displayed in your preferred style.
Our Experience Making this Drawn Dripping Paint Art Project
This is a great project to introduce kids to painting the illusion of wet surfaces. It allows them a chance to explore shadows and highlights, while also challenging their brush skills. Afterwards, kids can apply what they have learned to future projects.
Prep Time
5 minutes
Active Time
30 minutes
Total Time
35 minutes
Difficulty
Medium
Estimated Cost
$1
Materials
- Cardstock
- Water
- Paper Towel
Tools
- Permanent Marker
- Acrylic Paints or Paint Pens
- Round Paintbrushes
- Paint Palette
Instructions
- Draw drips of paint onto cardstock. Create various size drips for a more realistic appearance. Also, the bottoms of the drips should appear larger, or rounder, than the top portion, indicating the bead of paint that is dripping down the page.
- Use the permanent marker to draw bold shadows along one side of the paint drips. The shape of the shadow line should mimic the shape of the original drip line drawn in previous step.
- Kids practice brush control while they add color to their paint drips. By painting with light pressure and just the tip of the brush, kids can paint in smaller places. They can also cover larger areas by applying more pressure and flaring the bristle out on the brush.
- Add shadows on your paint drips. These will be painted on the same side that the shadows were drawn with the permanent marker. Try not paint over the permanent marker, just beside it! Kids will need to use a darker shade than their paint drip color to create these shadows. For example, we added a touch of red to the yellow, a touch of blue to darken the green, and lastly a bit of purple into the blue.
- Use the tip of the paintbrush, and white paint, to add highlights on the paint drips. These will be painted on the opposite side of the drips than the shadows. Create highlights of various sizes and shapes that follow along with the outlines of the paint drips.
- Add any finishing touches to the painting. I chose to retrace the permanent marker lines at this point to cover where I had accidentally painted over them. Just be sure the paint is dry before touching up any of the permanent marker lines to protect your marker tip.
Notes
Draw Dripping Paint Art Variations
- Use acrylic paint pens for better control.
- Complete project on canvas, canvas paper, or another surface.
- Create various style drips, designs, and color combinations.
Draw Dripping Paint Art Variations
- Use acrylic paint pens for better control.
- Complete project on canvas, canvas paper, or another surface.
- Create various style drips, designs, and color combinations.
Other Fun Acrylic paint Art Projects from Kids Activities Blog
Did your kids enjoy drawing drips of paint? What was their favorite part about this project?

